
Perfect Rice Cooking Guide: Easy & Delicious Meals Every Time
Introduction
Rice, a simple grain that's been a food cornerstone for ages, plays a big role in the culinary world. Being a staple for over half the world's population, rice is crucial for providing sustenance and nutrition.
Its versatility allows it to be incorporated into a wide array of dishes, making it an indispensable ingredient in numerous culinary traditions. In this comprehensive guide, we will delve into the art of cooking rice, exploring various types and their unique characteristics while uncovering the secrets to achieving perfectly cooked grains.
Importance of Rice as a Staple Food Worldwide
Rice stands tall as one of the most important staple foods across cultures and continents. Its significance lies not only in its ability to satiate hunger but also in its capacity to provide essential nutrients necessary for a balanced diet. Rich in carbohydrates, rice supplies energy that fuels our daily activities and aids in maintaining optimal bodily functions.
Moreover, rice is highly versatile; it can seamlessly adapt to different culinary traditions and palates around the world. From aromatic Biryani in India to delicate Sushi rolls in Japan or savory Paella from Spain, rice serves as the backbone of countless iconic dishes globally.
Various Types of Rice and Their Characteristics
The world of rice boasts an impressive variety with each type possessing its distinct characteristics that affect taste, texture, aroma, and nutritional value. White rice is perhaps the most widely consumed type globally; it undergoes milling to remove the bran layer resulting in grains with a polished appearance. This process gives white rice its signature fluffy texture when cooked.
Brown rice is another popular option known for its higher nutrient content compared to white varieties. It retains its bran layer during milling which preserves essential vitamins, minerals, and dietary fiber contributing to improved digestion and overall health.
Brown rice has a nuttier flavor and chewier texture compared to its refined counterpart. Wild rice, although not technically rice but rather an aquatic grass, is worth mentioning for its unique characteristics.
Native to North America, wild rice possesses an earthy flavor and uneven shape. It requires longer cooking time and has a pleasantly chewy texture that adds interest to salads, pilafs, and stuffings.
Choosing the Right Rice
Understanding the Differences Between White, Brown, and Wild Rice
When it comes to choosing rice for your culinary endeavors, there are various options available. Understanding the differences between white, brown, and wild rice is crucial to selecting the perfect grain for your dish. White rice is the most commonly consumed type of rice worldwide.
It has been milled and polished to remove the outer bran layer, germ, and husk. This process results in a mild flavor and delicate texture that appeals to many palates.
White rice is known for its ability to absorb flavors during cooking, making it a versatile option for a wide range of dishes. On the other hand, brown rice retains its nutritious bran layer intact as it undergoes minimal processing.
This gives brown rice a chewy texture and nutty flavor that many health-conscious individuals prefer. The bran layer contains valuable dietary fiber and essential nutrients such as magnesium, phosphorus, and B vitamins.
With its higher nutritional content compared to white rice, brown rice is an excellent choice for those looking for a healthier alternative. Wild rice is technically not true rice but rather a grain harvested from aquatic grasses native to North America.
With its dark color and distinctive earthy taste, wild rice adds depth of flavor to any dish. It stands out due to its unique long-grain shape with an outer sheath or hull that stays intact even after cooking.
Considering the Cooking Time and Nutritional Value of Each Type
When deciding which type of rice to cook, it's essential not only to consider taste but also cooking time and nutritional value. White rice typically has a shorter cooking time compared to brown or wild varieties due to its refined nature—cooking times can range from 15-20 minutes depending on the specific strain or grain length.
Brown rice requires longer cooking times due to the presence of the bran layer, which needs extra time to soften. Typically, it takes around 40-45 minutes to cook brown rice adequately.
However, you can reduce the cooking time by soaking it for a few hours beforehand. Wild rice has the longest cooking time of all three types, taking approximately 45-60 minutes to become tender.
Since wild rice is often mixed with other varieties in recipes, it is essential to adjust cooking times accordingly. In terms of nutritional value, white rice lacks some nutrients compared to its less processed counterparts.
The bran and germ layers found in brown and wild rice contain higher amounts of dietary fiber, vitamins (such as B vitamins), minerals (like magnesium and phosphorus), and antioxidants. Therefore, while white rice may be more visually appealing due to its polished appearance, brown and wild rice offer superior nutritional benefits.
By understanding the differences between white, brown, and wild rice—including taste profiles, cooking times, and nutritional values—you can make an informed decision when selecting a type of rice that best suits your culinary needs. (Note: The article was written without any HTML tags other than the header tags for demonstration purposes only.)
Preparing Rice for Cooking
Rinsing Rice to Remove Excess Starch and Impurities
Before cooking rice, it is crucial to rinse it thoroughly to remove excess starch and any impurities. This step not only ensures fluffy and separate rice grains but also contributes to its taste. To rinse rice, place the desired amount in a fine-mesh sieve or colander and hold it under cold running water.

Gently stir the rice with your hand as the water flows through it, allowing the starchy residue to wash away. Repeat this process until the water runs clear, indicating that most of the starch has been removed.
Rinsing rice serves multiple purposes. Firstly, it helps eliminate any dirt or foreign particles that may be present on the grains' surface.
Additionally, rinsing reduces stickiness by removing excess surface starch, preventing clumping of cooked rice. Furthermore, rinsed rice tends to have a cleaner and fresher flavor profile since any dust or residues are washed away in this process.
Soaking Rice to Improve Texture and Reduce Cooking Time (Optional)
While not necessary for all types of rice, soaking can significantly improve both texture and cooking time. Soaking allows the grains to absorb moisture gradually before cooking begins, resulting in more evenly cooked and fluffier rice. For long-grain varieties like basmati or jasmine rice, soaking for about 30 minutes before cooking can help achieve optimal results.
Simply place the rinsed rice in a bowl and cover it with enough water so that there's at least an inch of liquid above the grains. Let it soak undisturbed for around 30 minutes before draining off any excess water prior to cooking.
Keep in mind that shorter-grain rices such as sushi or arborio may benefit less from soaking due to their higher starch content. However, if you prefer a softer texture or want to reduce cooking time, soaking these varieties for 15-20 minutes can still yield satisfactory results.
Proportions: Water-to-Rice Ratio for Different Types of Rice
Determining the correct water-to-rice ratio is crucial in achieving perfectly cooked rice. The ratio may vary depending on the type of rice being used and personal preference.
Here are some general guidelines to follow: - For long-grain white rice: Use a ratio of 1 and 3/4 cups of water per cup of rice.
This will result in light and fluffy grains. - For brown rice: Increase the water slightly to a ratio of 2 cups of water per cup of rice.
Brown rice requires more liquid due to its bran layer, which takes longer to soften. - For wild rice: Wild rice has a tougher outer layer that requires extra cooking time and liquid absorption.
Use a ratio of 3 cups of water per cup of wild rice for tender results. It's worth noting that individual preferences may vary when it comes to the desired texture and moisture level in cooked rice.
Adjustments can be made by slightly increasing or decreasing the amount of water used based on personal taste preferences. Taking these factors into account while preparing your rice will ensure that you achieve consistently delicious results with every pot you cook.
Stovetop Method:
The stovetop method is a classic way of cooking rice that requires attention and precision. To begin, measure the desired amount of rice and place it in a fine-mesh strainer. Rinse the rice under cold running water until the water runs clear, which helps remove excess starch and achieve fluffier grains.
Once rinsed, set it aside briefly. In a saucepan or pot with a tight-fitting lid, bring water to a rolling boil over high heat.
The general rule of thumb is to use 1.5 to 2 cups of water for every cup of rice, but this may vary depending on the type of rice you are using – long grain, medium grain, or short grain. Once the water reaches a boil, carefully add the rinsed rice to the pot.
Stir gently to distribute evenly and then reduce the heat to low. Cover with the lid tightly and let it simmer undisturbed for the recommended cooking time according to your specific type of rice.
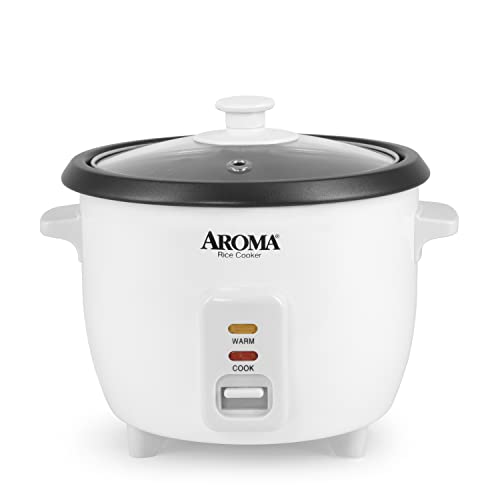
Rice Cooker Method:
The invention of modern technology has made cooking rice incredibly convenient with the use of electric rice cookers. These appliances eliminate guesswork by employing automated functions that ensure consistent results every time.
To use a rice cooker, start by adding rinsed and drained rice into the cooker pot. The rinsing process removes excess starch and prevents clumping during cooking.
Next, add an appropriate amount of water according to your specific cooker's instructions – typically indicated by measuring lines on the inner pot. Selecting an appropriate setting is crucial as different types of rice require different cooking times and heat levels.
The most common settings include white (for regular white or basmati), brown (for brown or whole-grain varieties), sushi (for stickier rice used in sushi), and more. Once the setting is chosen, press the start button to commence the cooking process.


Monitoring and Adjusting:
While both stovetop and rice cooker methods require following specific cooking times, it is essential to keep an eye on the pot throughout the process. For stovetop cooking, in particular, monitoring is vital to ensure that the rice doesn't overcook or stick to the bottom of the pan.
If you notice that all the water has been absorbed before the recommended cooking time has elapsed, but your rice still seems undercooked or too firm, add a small amount of additional hot water (about 1/4 cup at a time) and continue simmering until desired tenderness is achieved. Conversely, if your rice is too soft or mushy and there's excess water left after reaching the recommended time, use a fork to fluff it up gently and leave it uncovered for a few minutes.
The residual heat will help evaporate excess moisture. By staying attentive during this culinary process, you can ensure perfectly cooked rice that complements your meal beautifully.

Enhancing Flavor and Texture
Tips for flavoring
When it comes to cooking rice, flavoring is key to transforming a plain dish into a delightful culinary experience. While rice has a natural mild taste, there are various ways to enhance its flavor profile. One simple method is adding salt or broth to the water before cooking.
This helps infuse the grains with a subtle savory undertone that complements other ingredients in your dish. Remember to adjust the amount of salt or broth based on personal preference and the type of rice you are using.
If you want to take your rice to another level, experimenting with herbs, spices, or aromatics like garlic or onion can do wonders. These ingredients can be added during the cooking process and render delightful fragrances and flavors.
For instance, you can consider sautéing finely chopped onions in a little oil before adding them to the pot of rice along with water or broth. Alternatively, you could add crushed garlic cloves while preparing rice for an aromatic touch that pairs well with various cuisines.
Tips for texture
Apart from flavor, achieving the perfect texture in cooked rice is equally important. No one wants overly clumpy or mushy grains!
To achieve fluffy and separate rice grains, it's crucial to fluff them up gently after cooking using a fork. Simply run the tines of a fork through the cooked rice while gently separating any clumps that may have formed during cooking.
This simple step helps loosen up any sticky portions and ensures even distribution of moisture throughout. In addition to fluffing, allowing cooked rice to rest covered for a few minutes before serving can significantly improve its texture as well.
Covering the pot after removing it from heat creates a steamy environment that allows the grains to absorb any remaining moisture evenly. This resting period helps in achieving a more uniform and tender texture throughout the rice, resulting in a delightful eating experience.
Special Considerations
Cooking sticky/glutinous rice: soaking overnight is essential
When it comes to cooking sticky or glutinous rice, a traditional staple in many Asian cuisines, there are a few crucial considerations to keep in mind. Soaking the rice overnight is an essential step that ensures optimal results.
This process allows the grains to absorb enough water, resulting in stickier and more tender rice when cooked. The long soaking time breaks down the starches present in the grains and helps achieve the desired texture.
To properly soak sticky or glutinous rice, start by rinsing it thoroughly under running water until the water runs clear. Then place the rice in a bowl and add enough cold water to cover it completely.
Allow it to soak for at least six hours but preferably overnight. After soaking, drain off any excess water before cooking.
Cook
When cooking sticky or glutinous rice, there are two primary methods you can choose from: steaming or boiling. Steaming is often preferred as it maintains the integrity of each grain while ensuring they become tender and sticky. To steam sticky rice, first drain off any remaining soaking liquid and transfer the grains into a steamer lined with cheesecloth or banana leaves for added flavor.
Steam over high heat for about 30 minutes or until the rice becomes soft and translucent. Remember to keep the lid on during steaming to retain moisture.
Alternatively, boiling glutinous rice is another viable option. Start by adding soaked and drained sticky rice to a pot with sufficient water (about 1 cup of water per cup of soaked rice).
Bring it to a boil over medium-high heat before reducing the temperature and simmering with a tightly fitted lid for approximately 15-20 minutes. Stirring occasionally during cooking will help prevent sticking.
Conclusion
Cooking rice is a seemingly simple task that holds remarkable significance in culinary traditions worldwide. Whether you're preparing fluffy white rice, hearty brown rice, or sticky glutinous rice, understanding the specific considerations is key to achieving perfect results. From choosing the right type of rice to implementing proper rinsing and soaking techniques, each step contributes to enhancing both flavor and texture.
By following the outlined methods and taking into account any special considerations for sticky or glutinous rice, you can elevate your cooking skills and create delicious rice dishes that will impress your family and friends. So take a leap into the realm of culinary excellence and experiment with different types of rice to explore the vast possibilities they offer.
Remember, mastery takes practice, so don't be discouraged if your first attempt isn't flawless. With time and experience, you will become a seasoned rice-cooking maestro!